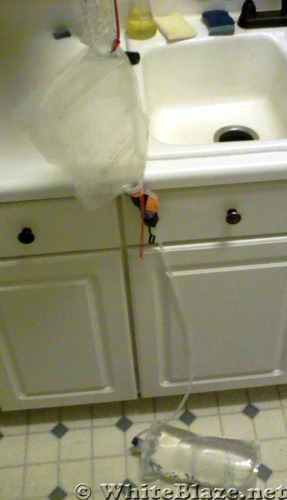
Can anyone point to a link that describes a simply gravity system that:
- Uses a Sawyer Mini
- Uses Evernew or Platypus Water bags
- For camp uses only
I recall that the rules of fluid dynamics required longer tubes than I might come up with myself, and something about a tornado tube attachment.
I want want to keep this simple, and not spend big bucks on for a hydration system reservoir. Doing this in a McGiver-like would be great, because that will impress my wife.
- Home
- Forum
- Journals
- Gallery
- What's New?
- Todays Posts
- 2,000 Miler Listing
-
Odd & Ends
- About WhiteBlaze/Tools
- About WhiteBlaze
- WhiteBlaze user agreement
- WhiteBlaze logo progression
- WhiteBlaze screen savers
- Purchase a banner spot
- Quick reference
- Usercp
- Subscribed Threads
- Members List
- Calendar
- Mark all forums read

 Reply With Quote